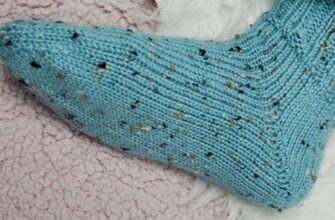
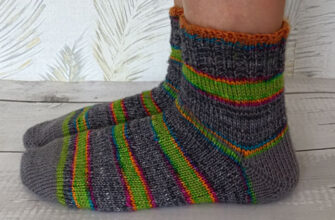
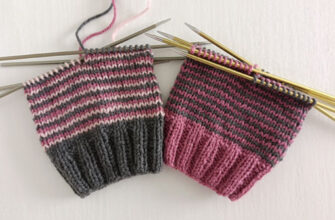
Cast-On for Toe-Up Knitting includes a variety of methods used to start socks, mittens, and hats. This article describes five of the most popular and easy-to-follow techniques commonly used by modern knitters.
The Judy’s Magic Cast-On, the Turkish cast-on, and the figure-eight cast-on can be used to create projects with an open edge without the need for a provisional cast-on. To do this, simply knit one row and transfer half of the stitches onto a holder, spare needle, or waste yarn.
AGGIE’S SIMPLE CAST-ON FOR TOE-UP SOCKS
This cast-on method for Toe-Up Knitting can be worked on two double-pointed needles (DPNs) or on circular needles.
(1). Using the long-tail cast-on method and starting with a slip knot on your needle, cast on half the required number of stitches for your toe, plus one additional stitch. For example, if your sock toe requires 28 stitches, cast on 15 (14 + 1) using the long-tail method.
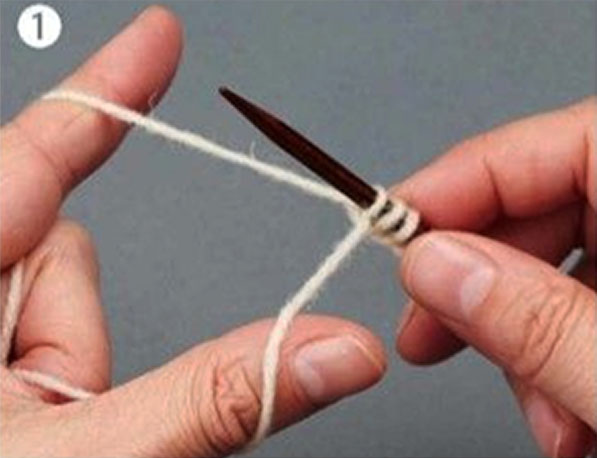
(2). Hold the needle with the cast-on stitches in your left hand, with the needle tip pointing to the right. Keep the yarn tail out of the way in your left hand.
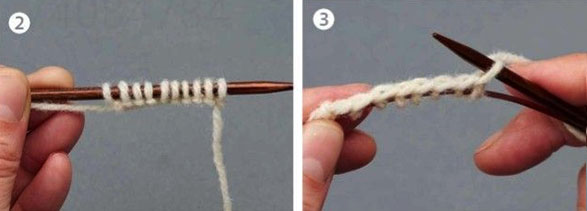
(3). Using your other needle tip or a separate DPN, pick up and knit (4) one stitch into the foot of the first cast-on stitch on your needle (the strand of yarn between stitches at the base). If you are using circular needles, you may find it easier to slide the cast-on stitches onto the cable first.
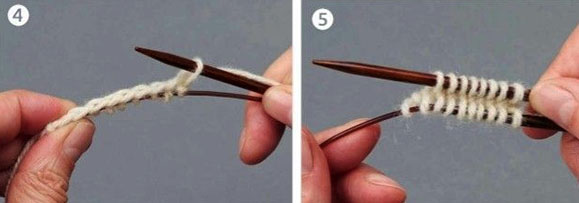
5. Continue in this way, picking up and knitting one stitch into the foot of each cast-on stitch until one cast-on stitch remains (your original slip knot). Do not pick up a stitch between the last two stitches.
You will now have an uneven number of stitches on your needles—one more on the bottom needle (the original cast-on) and one fewer on the top needle (the picked-up stitches). Transfer one stitch from the bottom needle to the top. (6).
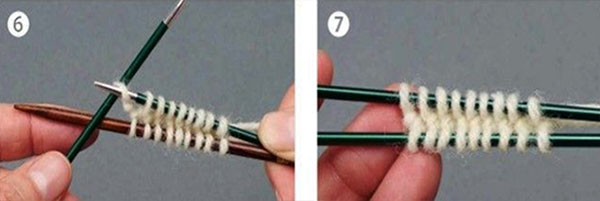
You now have an equal number of stitches on each needle and can begin working your toe. If desired, transfer the stitches to DPNs (7).
Judy’s Magic Cast-On for Toe-Up Knitting
This cast-on technique can be worked on a single set of circular needles, or on two double-pointed needles.
Casting On
1. Hold a set of circular needles (or two DPNs) in your right hand with the tips facing to the left, one needle above the other. Make a slip knot in the yarn, leaving a tail about 30 cm long, and place it on the top needle.
Hold both the tail and the working yarn between your middle, ring, and little fingers and your palm. Slip your thumb and index finger between the two strands, with the tail yarn over your index finger (as for a long-tail cast-on).
Steps 2–8 are the same whether you are using circular needles or DPNs.
2. Bring your index finger slightly toward you, taking the tail yarn underneath both needles…
3. …then bring it over the bottom needle and under the top needle. One stitch is cast on to the bottom needle.
4. Next, take your thumb underneath both needles, moving away from you…
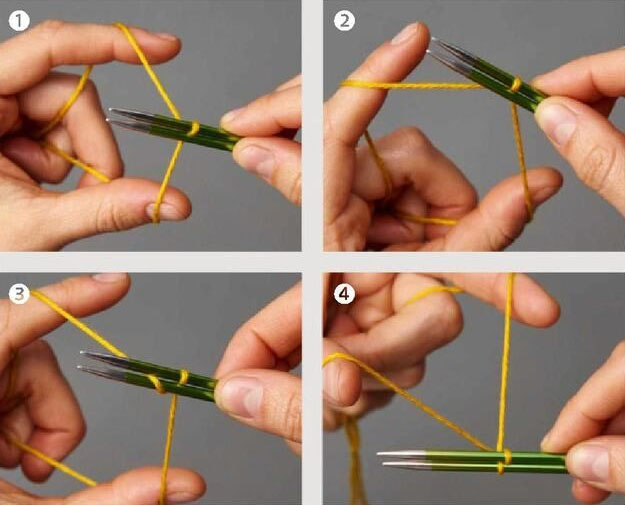
5. …then bring it over the top needle and under the bottom needle. One stitch is cast on to the top needle.
6. Repeat steps 2–3 to cast a second stitch onto the bottom needle, and steps 4–5 to cast a second stitch onto the top needle.
7. Continue alternating in this way.
8. Repeat steps 2–5 until you have the required number of stitches on the needles.
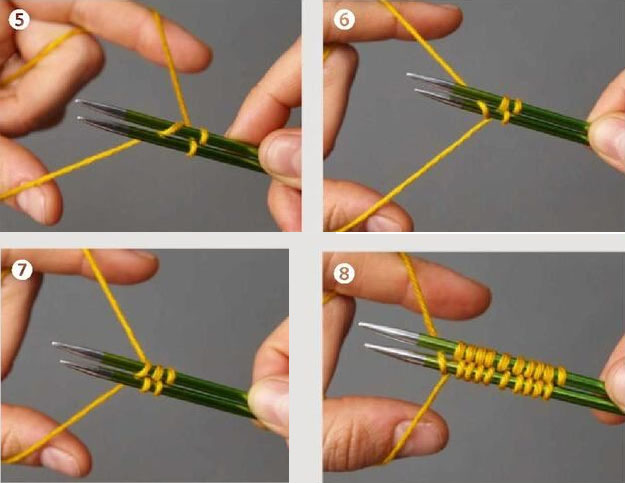
Working in the Round
9. To start working in the round, turn the needles so they are in your left hand, ready to work the first row. Pull out the bottom needle so that its stitches rest on the cable. If using DPNs, leave the stitches on the two needles. Make sure the yarn tail comes from the top needle and lies neatly under the working yarn.
10. Knit across the first row of stitches on the top needle using the other tip of the circular needle. If using DPNs, divide these stitches evenly onto two needles and knit them.
This row may feel tight and a bit fiddly, but it will become easier after the next row.
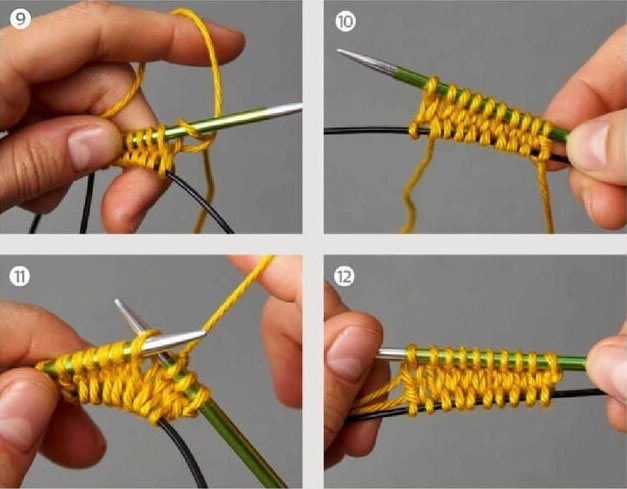
11. Turn the work, pull the cable through so that the top stitches are on the needle and the bottom stitches are on the cable, and knit all stitches through the back loop.
If using DPNs, work as in the previous row, dividing stitches evenly and knitting through the back loop.
12. You are now ready to begin working in the round as instructed in your pattern. If desired, you can transfer the stitches fully onto DPNs. (13)
The Turkish cast-on for Toe-Up Knitting
The Turkish cast-on for Toe-Up Knitting (here demonstrated on a circular needle) allows you to cast on in the round, creating a closed toe.
The longer the needle (or cable), the easier it will be to work.
- Make a slip knot. Hold the needles parallel and wrap the yarn around both needles.
Example: 12 wraps = 24 stitches. - Each wrap creates 2 stitches (wrap 6 times for 12 stitches, 4 times for 8 stitches, etc.).
Position the yarn between the two needles. - Gently pull the needle with the slip knot so that all stitches move onto the cable, leaving enough length to knit them with the other needle.
4. Using the free needle, knit all the stitches.
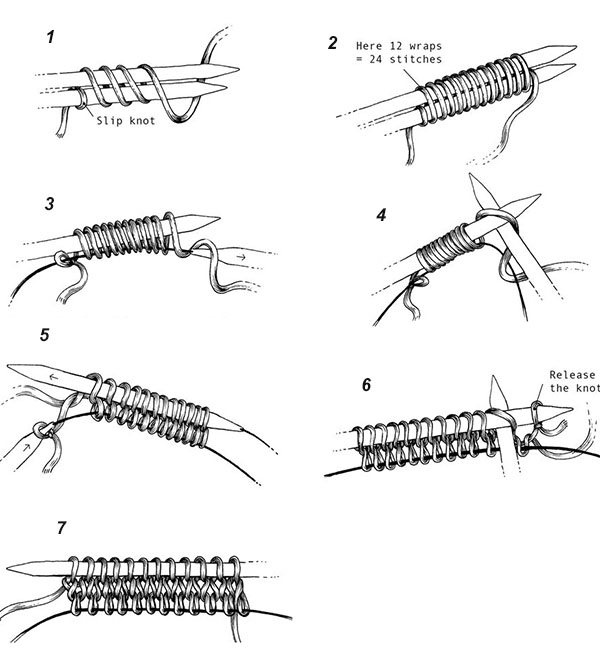
5. Slide the knitted stitches onto the cable, then slide the unworked stitches onto the needle and knit them. Turn the work.
6. Remove the slip knot and knit all stitches on the needle.
7. The cast-on is complete. You can now continue knitting in the round using the magic loop method or switch to double-pointed needles.
Figure-Eight Cast-On for Toe-Up Knitting
Another cast-on method that allows you to knit in both directions.
- Make the first loop on the needle and hold the yarn tail in your left hand (as in the Turkish cast-on).
- Position the second needle parallel to the first (similar to the Turkish cast-on).
- Wrap the yarn around both needles in a figure-eight pattern: around the lower needle counterclockwise, and around the upper needle clockwise, until the required number of stitches is cast on (see photos 1, 2).
- Pull out the lower needle so that the lower stitches move onto the cable. Knit the stitches on the upper needle.
- Knit the stitches on the second needle through the back loop (twisted knit stitches), inserting the needle from right to left (see photo 3).
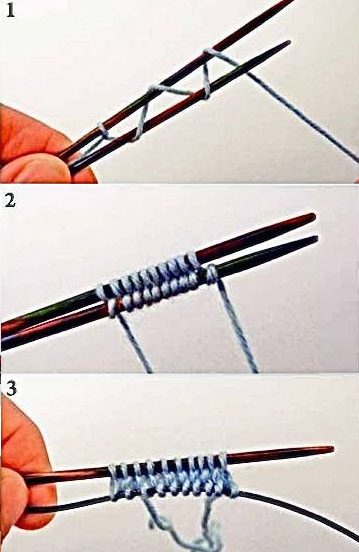
Figure-Eight Cast-On
Another cast-on method that allows you to knit in both directions.
- Make the first loop on the needle and hold the yarn tail in your left hand (as in the Turkish cast-on).
- Place the second needle parallel to the first (similar to the Turkish cast-on).
- Wrap the yarn around both needles in a figure-eight pattern: around the lower needle counterclockwise and around the upper needle clockwise, until the required number of stitches is cast on (see photos 1, 2).
- Pull out the lower needle so that the lower stitches slide onto the cable. Knit the stitches on the upper needle.
- Knit the stitches on the second needle through the back loop (twisted knit stitches), inserting the needle from right to left (see photo 3).
Loop Cast-On
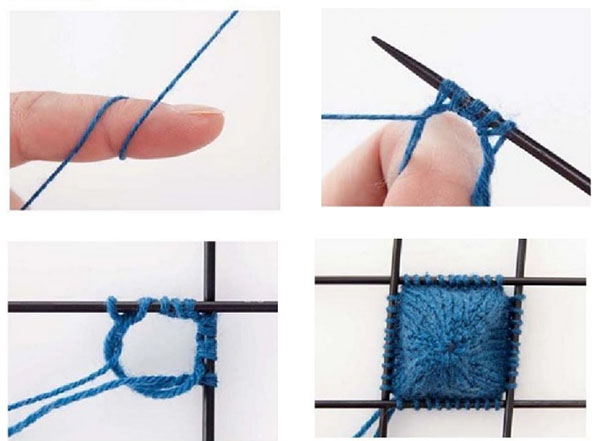
- Make a loop around the index finger of your left hand. The yarn tail should lie to the left, and the working yarn (coming from the ball) to the right. The working yarn should pass over the extended thumb; hold both the working yarn and the tail with your middle, ring, and little fingers.
- Insert a double-pointed needle into the double loop from right to left and pull the yarn from the thumb through the loop. Then make a yarn over above the loop. Repeat from * until there are 6 stitches on the needle.
- Cast on another 6 stitches onto a second needle in the same way. Place the needles parallel and position the yarn so you can continue knitting with the working yarn. Do not tie the short yarn tail.
Note: As you knit, the loop will become almost invisible. After a few rows, you can tighten it on the wrong side and secure it.
- Knit all 12 stitches, distributing them evenly onto 4 double-pointed needles. Place a marker to indicate the beginning of the round.
- In the next round: * knit 1 stitch, increase 1 stitch from the strand between stitches (make 1), knit 2 stitches; repeat from * on each needle.
Continue knitting in the round.
Conclusion
This article has covered 5 simple Ways to Cast On for Toe-Up Knitting of socks, mittens, and hats. We hope that with these clear and easy explanations, you will be able to confidently master techniques for knitting projects from the top down.
Read about toe-up knitting in our articles: