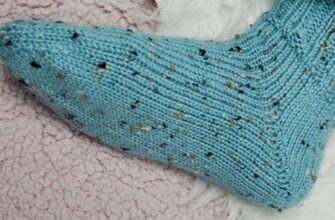
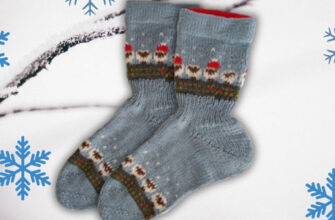
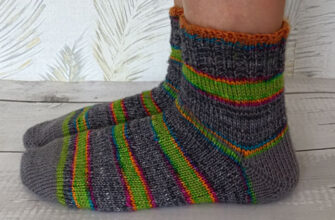
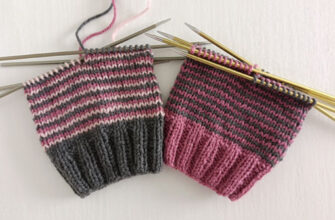
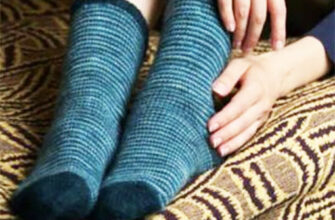
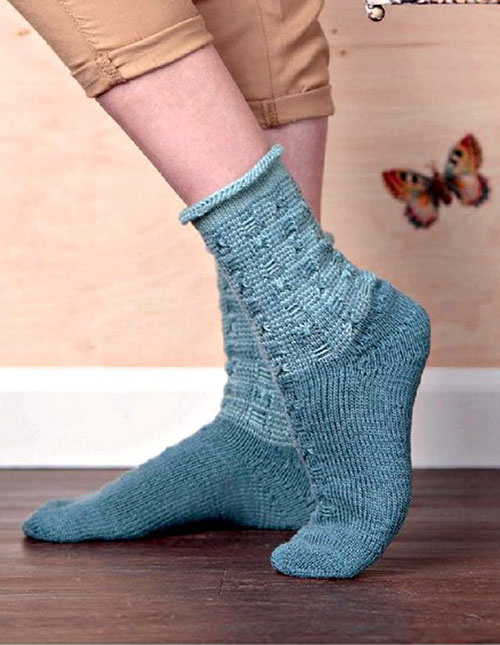
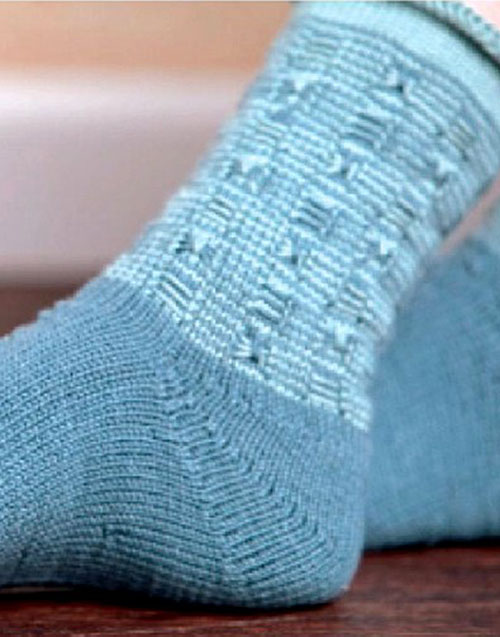
Women’s Flutterby socks are knitted from natural wool yarn with the addition of bamboo. Two soft shades of blue are used. The Sweet Tomato heel is shaped using short rows without wrap-and-turn stitches.
This type of heel is comfortable for knitting socks either from the cuff down or from the toe up. Therefore, the designer provides instructions for both methods so you can choose the preferred one.
Inspired as ever by nature, Cat Bordhi chose a slip-stitch pattern that reminded her of her grandson’s delight in butterflies. Directions are provided for knitting the socks either toe-up or top-down.
- Materials, Tools, and Knitting Techniques
- Size
- Yarn
- Needles
- Notions
- Gauge
- Stitch Guide Flutterby socks
- Instep Pattern
- Leg Pattern
- Toe-Up Version – Women’s Flutterby Socks
- Toe
- Foot for Flutterby Socks
- Heel Set-up
- Sweet Tomato Heel
- Begin Wedge
- The Thanks-Ma Round
- To Work a Thanks-Ma
- Heel Completion for Flutterby Socks
- Leg
- Cuff
- Top-Down Version – Women’s Flutterby Socks
- Cuff
- Leg
- Heel Set-up
- Sweet Tomato Heel forWomen’s Flutterby Socks
Materials, Tools, and Knitting Techniques
Size
About 6 (7, 8)” [15 (18, 20.5) cm] foot circumference. Foot and leg lengths are adjustable. Socks shown measure 8″ (20.5 cm) in foot circumference.
Note: To allow for stretch, the sock circumference measures about 15% smaller than the actual circumference measured just above the ball of the foot (see below).
Yarn
Fingering weight (#1 Super Fine). Shown here: Frog Tree Pediboo (80% merino, 20% bamboo; 255 yd [233 m]/100 g): 1164 Blue (MC) and 1196 Light Blue (CC), 1 skein each.
Needles
U.S. size 1½ (2.5 mm): one long circular needle (cir), two circular needles, or a set of four double-pointed needles (dpn). Adjust needle size if necessary to obtain the correct gauge.
Note: If using dpns, you will need a circular needle to try on the heel for fit.
Notions
Four locking markers (m) labeled A, B, C, and D; tapestry needle.
Gauge
32 sts and 50 rnds = 4″ (10 cm) in St st.
Stitch Guide Flutterby socks
Insert the right needle beneath all 3 horizontal strands (e.g., under the strand from Rnd 1, then the strand from Rnd 3, and then the strand from Rnd 5) so that the needle tip emerges above them. Catch a loop of yarn with the needle tip and draw it back down beneath all 3 strands, pulling the strands upward. Slip the next stitch as if to knit, then insert the left needle into the fronts of these 2 stitches (as if to work an ssk) and knit them together.
Instep Pattern
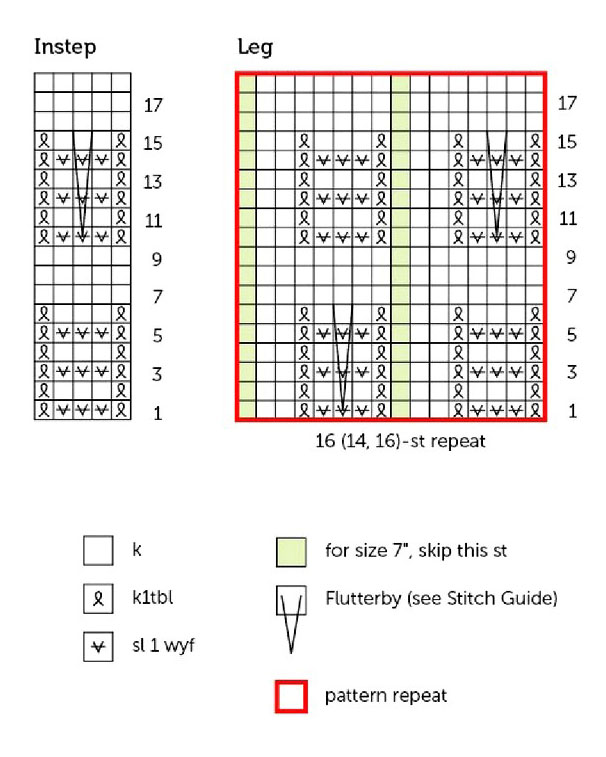
(See Charts) Worked over 5 sts.
Rnds 1, 3, and 5: K1tbl, slip next 3 sts purlwise (pwise) with yarn in front (wyf), k1tbl.
Rnds 2, 4, and 6: K1tbl, k3, k1tbl.
Rnds 7–9: Knit.
Rnds 10, 12, and 14: K1tbl, slip next 3 sts pwise wyf, k1tbl.
Rnds 11 and 13: K1tbl, k3, k1tbl.
Rnd 15: K1tbl, k1, Flutterby (see Stitch Guide), k1, k1tbl.
Rnds 16–18: Knit.
Rep Rnds 1–18 for patt.
Leg Pattern
(See Charts)
Rnds 1, 3, and 5: *K1tbl, slip next 3 sts pwise wyf, k1tbl, k3 (2, 3); rep from * to D.
Rnds 2 and 4: *K1tbl, k3, k1tbl, k3 (2, 3); rep from * to D.
Rnd 6: *K1tbl, k3, k1tbl, k3 (2, 3), k1tbl, k1, Flutterby, k1, k1tbl, k3 (2, 3); rep from * to D.
Rnds 7–9: Knit.
Rnds 10, 12, and 14: *K1tbl, slip next 3 sts pwise wyf, k1tbl, k3 (2, 3); rep from * to D.
Rnds 11 and 13: *K1tbl, k3, k1tbl, k3 (2, 3); rep from * to D.
Rnd 15: *K1tbl, k1, Flutterby, k1, k1tbl, k3 (2, 3), k1tbl, k3, k1tbl, k3 (2, 3); rep from * to D.
Rnds 16–18: Knit. Rep Rnds 1–18 for patt.
Toe-Up Version – Women’s Flutterby Socks
This section provides a detailed description of the Toe-Up version of the Women’s Flutterby Socks.
Toe
With MC, work Turkish CO as foll: Hold 2 needles parallel with the points aimed to the right. Leaving a 10″ (25.5 cm) tail, make a slipknot and place it on the lower needle.
Wrap the working yarn under, around, and over both needles (like a wave receding under the needles, then coming over the needles toward you) 3 times.
Begin a fourth wrap but stop just before coming over the needles, securing the working yarn against the needle with a finger. Use the working yarn to knit 3 sts from the top needle. With RS facing, rotate needles clockwise 180 degrees, remove the slipknot from the needle, and pull the knot free.
Rnd 1: Knit 6 sts (3 on each needle) with tail and working yarn held together — 6 doubled sts; 12 loops on needles. Drop tail yarn and continue with working yarn alone.
Rnd 2: Knit into each half of doubled sts — 12 sts.
Note: If using dpns, place 4 sts on each of 3 needles.
Rnd 3: Place marker C for beg of rnd (or use intersection to represent C), [k1, k1f&b (see Glossary)] 6 times — 18 sts.
Rnd 4: Knit.
Rnd 5: [K2, k1f&b] 6 times — 24 sts.
Rnd 6: Knit.
Rnd 7: [K3, k1f&b] 6 times — 30 sts.
Rnd 8: Knit.
Rnd 9: [K4, k1f&b] 6 times — 36 sts.
Rnds 10–11: Knit.
Rnd 12: [K5, k1f&b] 6 times — 42 sts.
Rnds 13–14: Knit.
Rnd 15: [K6, k1f&b] 6 times — 48 sts. Cont for your size as foll:
Size 6″ (15 cm) only
Skip to Foot.
Sizes 7 (8)” (18 [20.5] cm) only
Rnds 16–17: Knit.
Rnd 18: [K7, k1f&b] 6 times — 54 sts.
Rnds 19–20: Knit. Cont for your size as foll:
Size 7″ (18 cm) only
Rnd 21: [K26, k1f&b] twice — 56 sts.
Skip to Foot.
Size 8″ (20.5 cm) only
Rnd 21: [K8, k1f&b] 6 times — 60 sts.
Rnds 22–23: Knit.
Rnd 24: [K9, k1f&b, k9, k1f&b, k10] 2 times — 64 sts.
Foot for Flutterby Socks
Note: The first 24 (28, 32) sts will be worked as the sole. Knit until the toe measures about 3″ (7.5 cm) long.
Next rnd: K34 (40, 46), place marker D, knit to C (end of rnd).
Begin Flutterby patt as foll:
Next rnd: Knit to D, work Instep Chart (see Stitch Guide or Charts), knit to C.
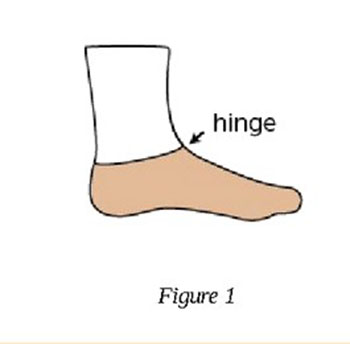
Work in pattern until the sock reaches the “hinge” at the top of the instep, where the leg and foot bend (Figure 1), stopping on any rnd that brings you to the hinge. Note the last rnd worked so that you will know where to resume.
Notes
• Always slip the first stitch of each row purlwise with the yarn held in front on the purl side or in back on the knit side; this keeps the yarn out of the way.
• Keep firm tension on the first few stitches of each row for best results.
• Marker C may be removed if desired.
• All wedges begin at A.
Heel Set-up
The heel is worked over approximately 2/3 of the total sts, with the remaining 1/3 centered on the instep.
Next rnd: Knit to 6 (7, 8) sts before D and place marker A. Without knitting further, place marker B 11 (12, 13) sts after D — 17 (19, 21) front/instep sts (from A to B), 31 (37, 43) back heel sts (from B to C to A). Yarn waits at A.
Arrange Front and Back
Note: Intersections may be used in place of stitch markers if desired.
Arrange sts as follows (Figure 2):
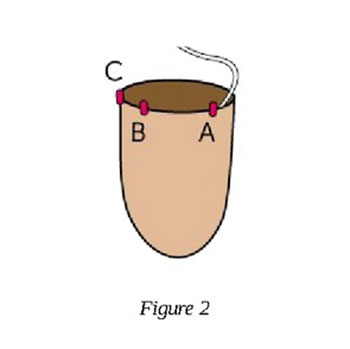
Dpns: Sts for instep on 1 needle; sts for heel on 2 needles.
2 circulars: Front and back on separate needles.
1 circular: Front and back on separate cable sections.
Sweet Tomato Heel
Unlike the standard short-row heel, which has two wedges with steep sides, a Sweet Tomato Heel has three wedges with gently sloping sides. After each wedge is complete, two full rounds anchor and integrate it with the instep. The heel is custom-fitted by either ending the third wedge early (for a small heel) or completing it (for a larger heel).
Begin Wedge
Slide marker A to the right needle and turn the work.
Short-row 1: (WS) Slip 1, purl to B, turn (Figure 3).
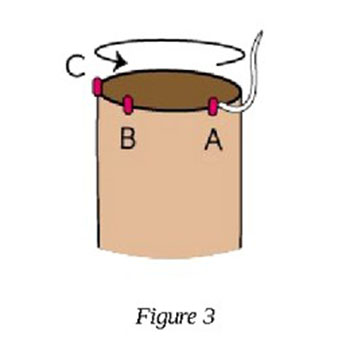
Note: From this point forward, each row will be 2 sts shorter than the previous row.
Short-row 2: (RS) Slip 1, knit to 2 sts before A, turn.
Short-row 3: Slip 1, purl to 2 sts before B, turn.
Short-row 4: Slip 1, knit to 4 sts before A, turn.
Short-row 5: Slip 1, purl to 4 sts before B, turn.
Short-row 6: Slip 1, knit to 6 sts before A, turn.
Short-row 7: Slip 1, purl to 6 sts before B, turn.
Short-row 8: Slip 1, knit to 8 sts before A, turn.
Short-row 9: Slip 1, purl to 8 sts before B, turn.
Continue working progressively shorter rows until, as you begin a knit row, the center of the heel (between wrapped sts) measures about 1″ (2.5 cm) wide.
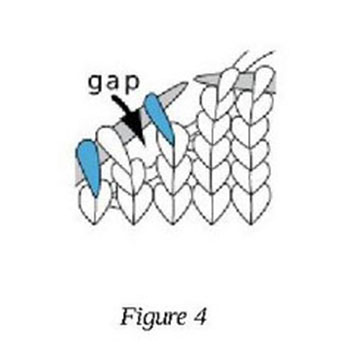
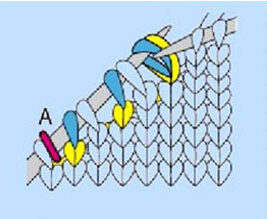
Next rnd: (RS; Thanks-Ma Rnd) Slip 1, knit across the center of the heel to the last stitch before the first gap (Figure 4), then work the Thanks-Ma Rnd as described and illustrated below.
The Thanks-Ma Round
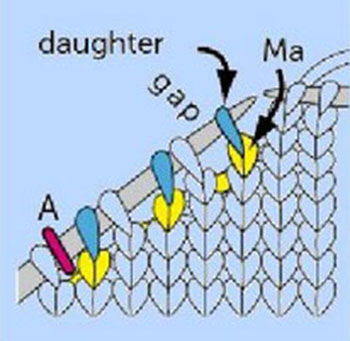
Daughter Blue rises from her yellow Ma. See how Ma’s yellow arm bridges the gap? Lifting Ma up onto the needle will shorten her arm and close the gap.
To Work a Thanks-Ma
Lift Ma’s right side up onto the needle in front of Blue. Knit them together (as if to knit 2 together), and the gap closes. Thanks, Ma!
Work [k1, Thanks-Ma] “downhill” to A, then work in pattern around the front of the sock to B (keeping the center 5 sts of the instep in pattern, following the Instep Chart).
On the “uphill” side, a gap appears between B and Blue (Figures 5 and 6). Ma’s arm bridges the gap. Ma’s right side may be hiding behind her left side; don’t let her fool you.
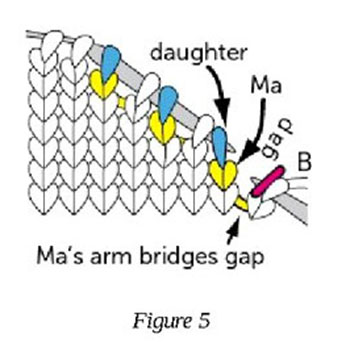
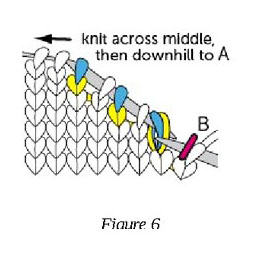
Find Ma’s right side and work a Thanks-Ma to close the gap. Work [k1, Thanks-Ma] uphill until all gaps are closed. Knit across the middle, then downhill to A.
Next rnd: Work even in pattern to A.
The first wedge is complete (anchored and integrated by two full rounds).
Work the second wedge following the same instructions as for the first wedge, ending with the second full round and keeping the center 5 instep sts in pattern, following the Instep Chart.
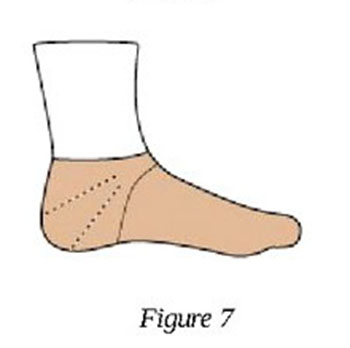
Work a third wedge until the center of the heel is about 2″ (5 cm) wide, ending after a purl row. Try on the sock for fit; if using dpns, slip the sts onto a circular needle to try it on. For many knitters, working only part of a third wedge is sufficient; if so, skip to Heel Completion. If not, continue following the wedge directions and work additional short-rows (each one 2 sts shorter than the previous row) until the top of the heel and the top of the instep are about even and the fit is satisfactory (Figure 7), ending after completing a purl row.
Wedge in Progress
Markers A and B mark the start and end of the heel. Slip stitches (in blue) begin each row. A pair of stitches—a slip stitch followed by a knit stitch—is located above each gap. Paired stitches, separated by gaps, begin to line up along the sides (see below). Always turn 2 stitches before the next gap.
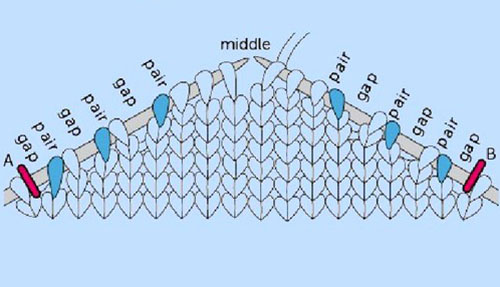
Heel Completion for Flutterby Socks
Knit across the center of the heel to the last stitch before the first gap, work a Thanks-Ma, work [k1, Thanks-Ma] to A, remove A, work around the front of the sock in pattern (keeping the center 5 sts of the instep in pattern, following the Instep Chart), remove B, and work [Thanks-Ma, k1] until all gaps are closed.
Leg
Knit to D; this is the new beg of rnd. The pattern will now circle the entire leg and be worked in stripes. Work in pattern to the end of Rnd 7 or 16 (whichever comes first). Beginning with the next rnd of the patt, work 65 rnds according to the Leg Chart (see Stitch Guide or Chart) over all sts, alternating 1 rnd of CC with 1 rnd of MC throughout, ending with Rnd 9 or 18. Break CC and cont in MC.
Note: Always pick up the new color from beneath the old color. The pattern (particularly the twisted stitches) makes it difficult to see the color change, so the yarn change may fall at the front without being visible.
Cuff
With CC, work in stockinette stitch for 1¼” (3.2 cm). Use Jeny’s Surprisingly Stretchy method (see Glossary), or another elastic method, to BO all sts.
Weave in loose ends.
Top-Down Version – Women’s Flutterby Socks
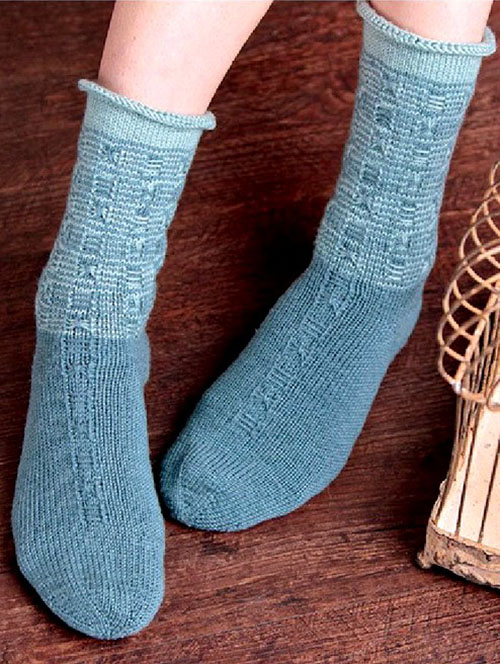
This section provides a detailed description of the Top-Down version of the Women’s Flutterby Socks.
Cuff
With CC, loosely CO 48 (56, 64) sts. Place marker D for beg of rnd and join for working in the rnd, being careful not to twist sts.
Knit for 1¼” (3.2 cm).
Leg
The leg is worked in stripes. Change colors at D every rnd, always picking up the new color from beneath the old. The pattern (particularly the twisted stitches) makes it difficult to see the color change, so the yarn change may fall at the front without being visible.
Knit 1 rnd with MC; knit 1 rnd with CC; knit 1 rnd with MC.
Changing colors at D every rnd, work Leg Chart in the rnd over all sts 3 times, then work Rnds 1–7 once more. Break CC.
Heel Set-up
Work Heel Set-up as for the Toe-Up version.
Sweet Tomato Heel for Women’s Flutterby Socks
Work Sweet Tomato Heel as for the Toe-Up version through Heel Completion, keeping the first 5 sts after D in pattern following the Instep Chart for full heel rounds.
The article describes two methods for knitting Women’s Flutterby Socks with a Sweet Tomato heel. You can choose whichever you prefer, either the toe-up or the cuff-down method.
You may like: