When knitting, you often need to change yarn colors in a way that preserves the stitch pattern and keeps the finished fabric looking neat and professional.
In this article, we will look at several methods for changing colors when working horizontal stripes in flat knitting on straight needles using simple knit-and-purl stitch patterns. Techniques for changing colors when knitting in the round are covered in our article: Three 3 Ways to Change Yarn Color When Knitting in the Round.
- Knitting Stripes
- Garter Stitch
- How to Change Yarn Colors in Garter Stitch
- Stockinette Stitch
- How to Change Yarn Colorsin Stockinette Stitch
- Stockinette Stitch with a Garter Stripe
- How to Change Yarn Colors in Stockinette Stitch with a Garter Stripe
- Stitch Patterns Combining Knit and Purl Stitches in the Same Row
- How to Change Yarn Colors in a 2 × 2 Rib Pattern
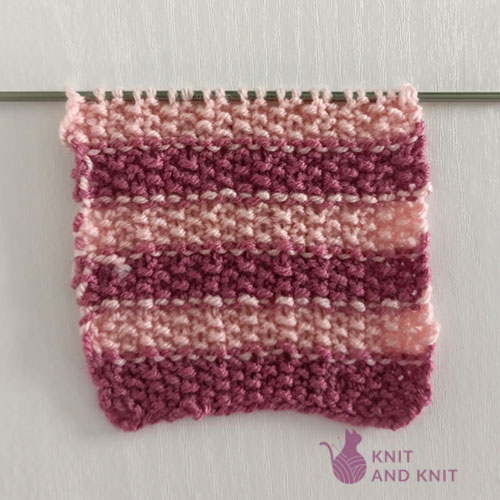
- How to Change Yarn Colors in Seed Stitch
- Differences in Gauge Between Stitch Patterns
- Basic Techniques for Changing Yarn Colors
- Adding a New Color Invisibly in Stripes
- Changing Color on the Right Side
- Carrying Yarn Up the Side of the Work
- Knitting Without a Purl-Dash Line at the Color Change
- Conclusion
Knitting Stripes
Stripes add visual interest and character to knitted projects. Depending on the design, changing yarn colors can also create additional texture and highlight the structure of the fabric.
Creating flawless stripes in stitch patterns based on knit and purl stitches requires only a few simple techniques, which we will explore in this article.
For simplicity, the examples use two yarn colors. Feel free to change colors as often as you like. Experiment with multicolored knitting and choose stripe widths that suit your project.
Garter Stitch
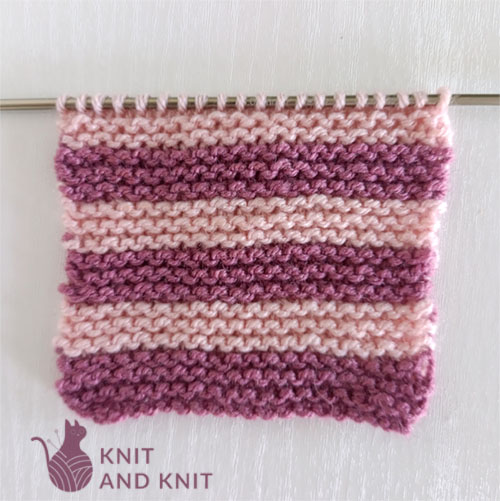
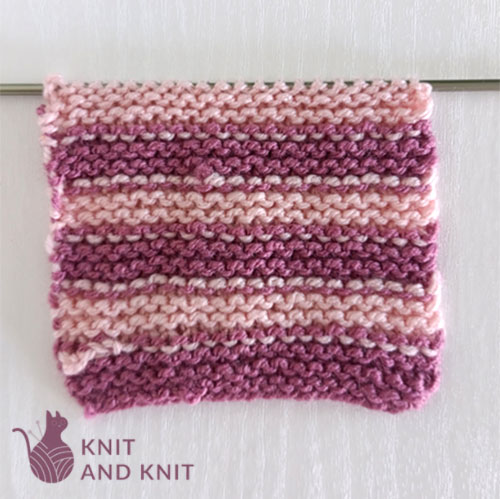
When every row is worked in knit stitches, the result is the simplest stitch pattern of all: Garter Stitch.
In my sample, the stripes are worked in 6-row repeats of Garter Stitch.
How to Change Yarn Colors in Garter Stitch
Cast on any number of stitches.
Row 1: Knit all stitches (right side).
Row 2: Knit all stitches (wrong side).
Repeat Rows 1 and 2 until the desired length is reached.
Always change colors on the right side of the work.
Stockinette Stitch
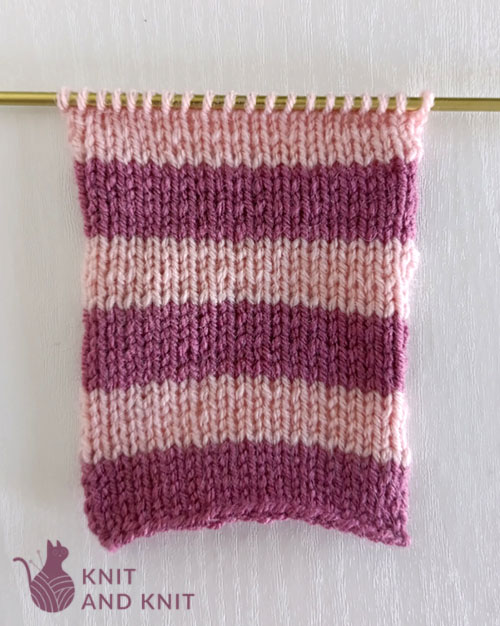
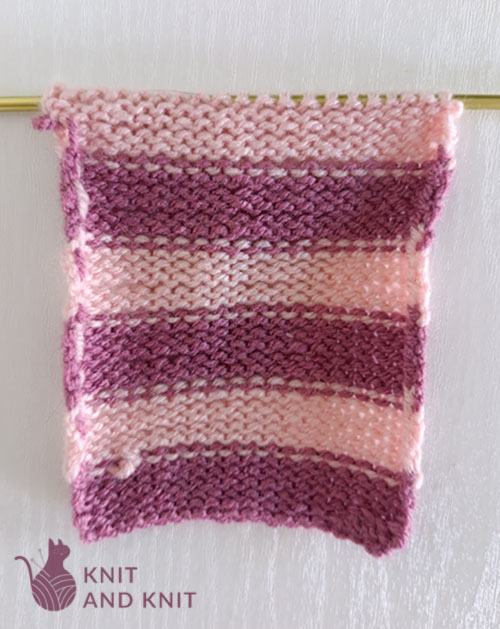
When you knit one row and purl the next, you create Stockinette Stitch.
In my sample, the stripes are worked in 6-row repeats of Stockinette Stitch.
How to Change Yarn Colors in Stockinette Stitch
Cast on any number of stitches.
Row 1: Knit all stitches (right side).
Row 2: Purl all stitches (wrong side).
Repeat Rows 1 and 2 until the desired length is reached.
Changing Yarn Colors: Change colors on the right side of the work, just before working a knit row.
Stockinette Stitch with a Garter Stripe
Interesting visual effects can be created by combining different stitch patterns. Stockinette Stitch with a Garter Stripe is one option that adds a textured accent at the color-change point. You can follow the pattern shown here or create your own combination of stitch patterns.
In my sample, the pattern is worked over a 6-row repeat: 4 rows of Stockinette Stitch in the main color, followed by a color change and 2 rows of Garter Stitch.
How to Change Yarn Colors in Stockinette Stitch with a Garter Stripe
Cast on any number of stitches.
Stockinette Stitch in Color A
Row 1: Knit all stitches (right side).
Row 2: Purl all stitches (wrong side).
Row 3: Knit all stitches.
Row 4: Purl all stitches.
Garter Stitch in Color B
Row 5: Knit all stitches.
Row 6: Knit all stitches.
Repeat: Rows 1–6 until the desired length is reached.
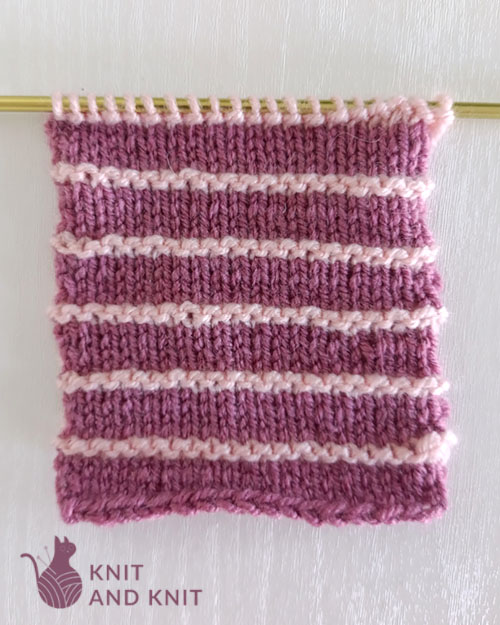
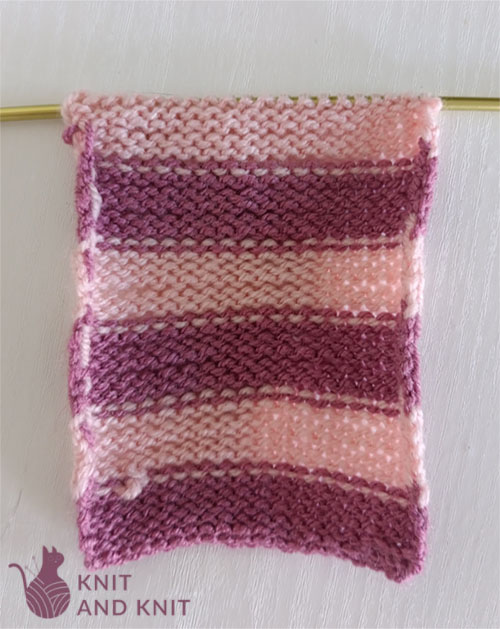
In my sample, the 6-row repeat consists of 4 rows of Stockinette Stitch in the main color followed by 2 rows of Garter Stitch in a contrasting color.
Stitch Patterns Combining Knit and Purl Stitches in the Same Row
Yarn colors can also be changed in stitch patterns that contain both knit and purl stitches within the same row. Below are two examples and an explanation of how they look when worked in stripes.
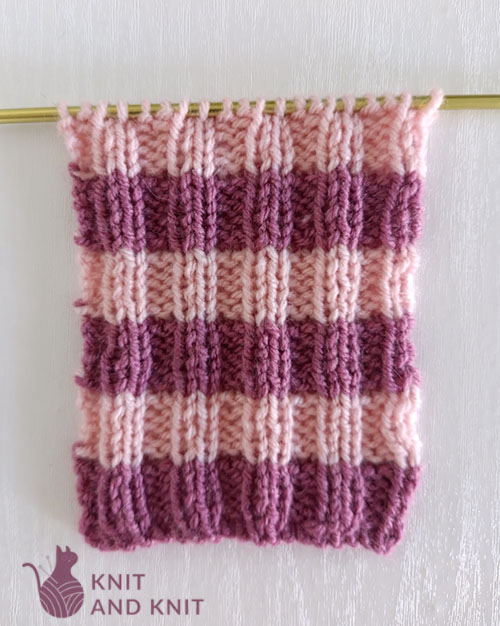
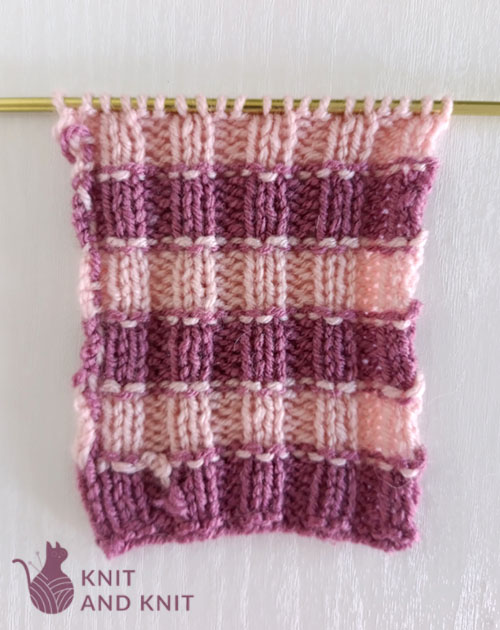
How to Change Yarn Colors in a 2 × 2 Rib Pattern
A 2 × 2 Rib fabric is thicker and more elastic, making it ideal for scarves, hats, blankets, and many other projects.
Normally, the rib pattern would be worked as a repeat of K2, P2. However, to achieve a cleaner color transition, the entire first row after changing colors is worked in knit stitches.
The number of stitches should be a multiple of 4.
Working with Color A
Row 1: Knit all stitches (right side).
Row 2: K2, P2 (wrong side). Repeat from * to * across the row.
Row 3: K2, P2 across the row.
Row 4: K2, P2 across the row.
Repeat: Rows 3 and 4 until the desired length is reached.
How to Change Yarn Colors: Change colors on the right side of the work, just before working Row 1.
Working one full knit row immediately after changing colors helps eliminate the noticeable purl-dash line that can appear at the color-change row.
How to Change Yarn Colors in Seed Stitch
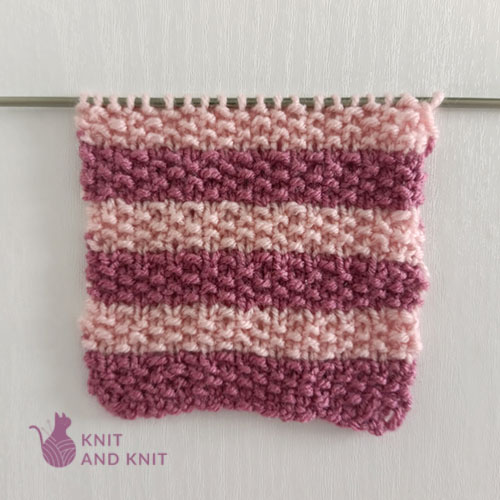
This stitch pattern gets its name from the raised bumps formed by the purl stitches, which resemble tiny seeds. The fabric is attractive, textured, and very durable.
Just as with 2 × 2 ribbing, we can eliminate the noticeable purl-dash line by replacing the first row of the K1, P1 pattern with a row worked entirely in knit stitches.
This technique really works! Seed Stitch looks much neater, and what could be simpler than knitting an entire row?
- Cast on an odd number of stitches.
- Working with Color A
Row 1: Knit all stitches (right side).
Row 2: K1, P1 across to the last stitch, ending with K1 (wrong side).
Row 3: K1, P1 across, ending with K1.
Row 4: K1, P1 across, ending with K1.
Repeat Rows 3 and 4 until the desired length is reached.
Changing Yarn Colors: Change colors on the right side of the work, just before working Row 1.
Differences in Gauge Between Stitch Patterns
It is worth noting the obvious differences in gauge between stitch patterns made from knit and purl stitches. Understanding these differences will help you make more accurate choices when selecting a stitch pattern for a project.
All of my samples were knitted with the same number of stitches and rows, yet their dimensions are clearly different.
The Stockinette Stitch sample is noticeably longer than the Garter Stitch sample. The purl rows create taller stitches, which lengthens the fabric.
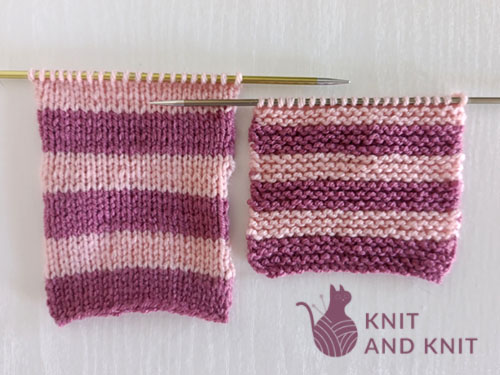
If you add a row of purl stitches to Stockinette Stitch, the sample becomes noticeably shorter, bringing its length closer to that of Garter Stitch.
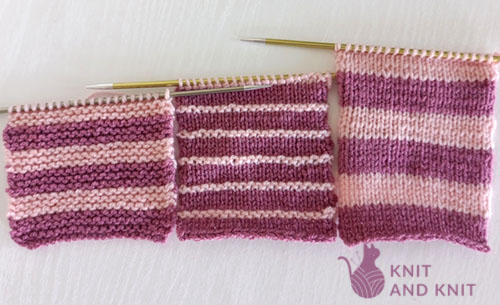
The 2 × 2 Rib sample ends up about the same size as the Stockinette sample because the purl stitches add height and elasticity to the fabric.

Basic Techniques for Changing Yarn Colors
Adding a New Color Invisibly in Stripes
Once you have finished knitting with Color A, switch to the new color.
Simply take Color B and form a small loop. There is no need to tie a knot — a simple loop is enough. Hold it with your fingers and use it to knit the next stitch on the right needle instead of the old working yarn. The tail of Color B can hang freely.
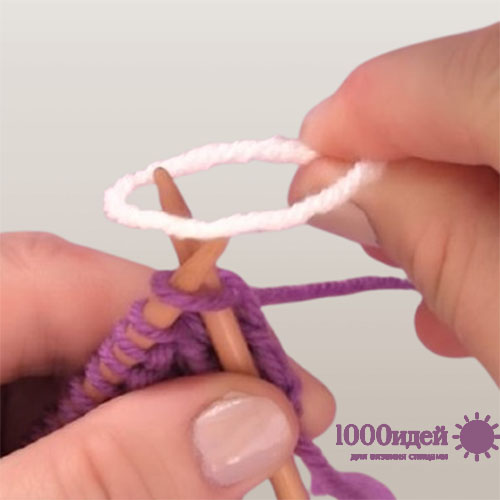
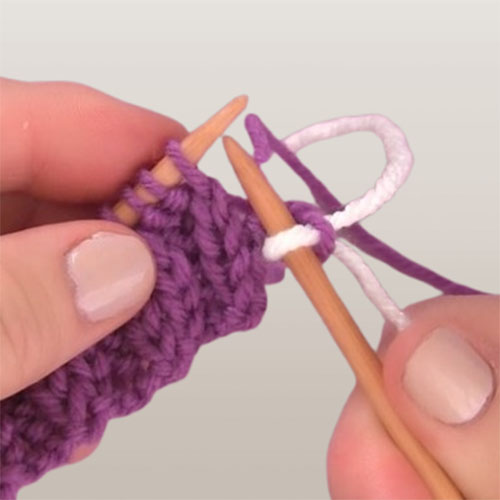
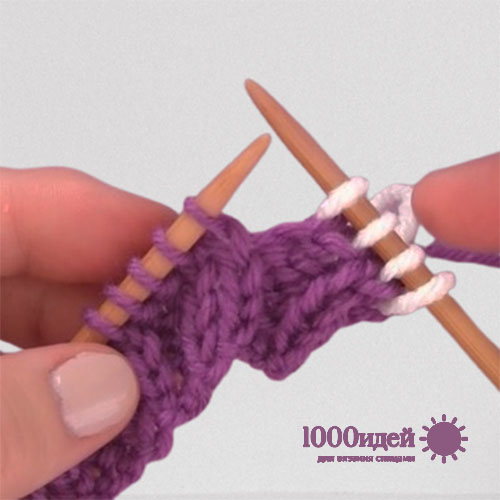
Now continue knitting the next row with Color B as usual. It really is that simple.
Of course, you will weave in the yarn tail later, but the color change itself is already complete and you can keep knitting.
Changing Color on the Right Side
The easiest way to change yarn colors is to do it at the beginning of a right-side row. This keeps all yarn tails on the same side of the fabric.
When you change color, you begin the new row on the front (right side) of the work.
Carrying Yarn Up the Side of the Work
This technique allows you to avoid cutting the yarn and weaving in ends after every color change.
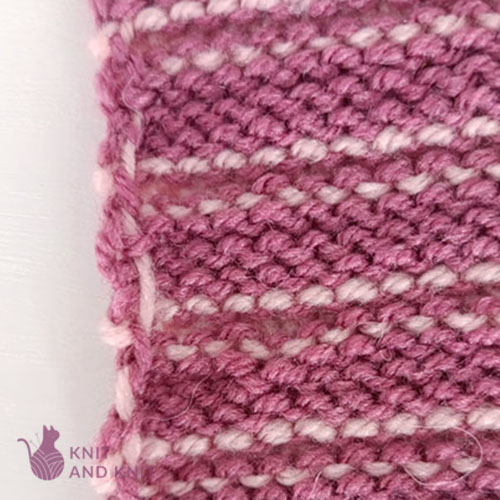
Here is how the small twists look along the side of the fabric on the wrong side when the yarn is carried upward.
To do it, take the yarn you want to carry up the side and place it over the working yarn — the yarn you are about to knit with.
Then continue knitting with the working yarn. As you knit the first stitch, the working yarn catches the carried yarn. This technique is also called twisting the yarns.
Continue knitting across the row.
It is a simple and useful trick that saves you from dealing with lots of yarn ends later.
Knitting Without a Purl-Dash Line at the Color Change
Now let’s look at how to change yarn colors so that the noticeable purl-dash line disappears in patterns that use both knit and purl stitches in the same row.
If the row where you change colors contains both knit and purl stitches, simply knit the entire row instead of working the stitch pattern.
For the written instructions for the two examples above, refer back to the previous section of the article.
Conclusion
This article explained how to change yarn colors when knitting stripes and transitions in stitch patterns that combine knit and purl stitches. I hope these simple and clear instructions help you knit stripes confidently and create neat, professional-looking color changes.
You may also like: